Note: This post was written in 2015 and covers OWIN self-hosting with ASP.NET Web API, which is a legacy technology. For modern .NET applications, consider using ASP.NET Core's built-in hosting model instead.
Setting up the project
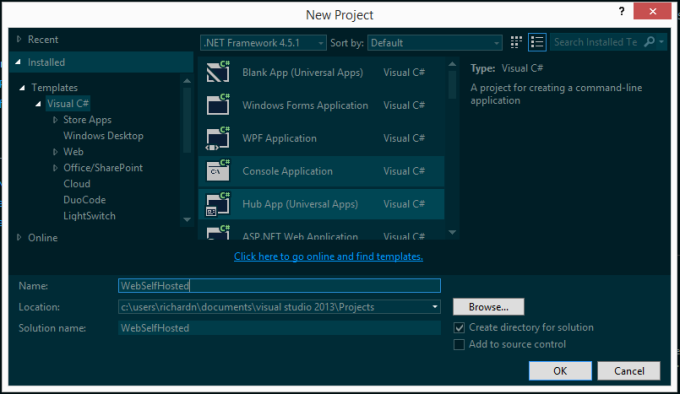
To begin you will need to create a new console application in Visual Studio.
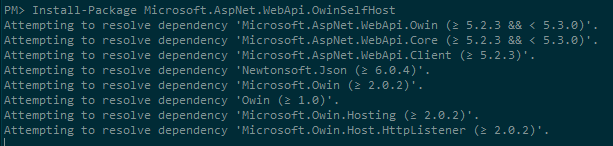
Once your application has been created open the Package Manager console and install the following packages.
Install-Package Microsoft.AspNet.WebApi.OwinSelfHost
Install-Package Microsoft.Owin.StaticFiles
This will install all the dependencies needed to build our application.
Startup class
Next, we will need to create a special class used by OWIN to bootstrap your web application called Startup with the following contents:
class Startup
{
    public void Configuration(IAppBuilder app)
    {
        HttpConfiguration config = new HttpConfiguration();
        config.Routes.MapHttpRoute(
            name: "DefaultApi",
            routeTemplate: "api/{controller}/{id}",
            defaults: new { id = RouteParameter.Optional }
        );

        app.UseWebApi(config);

        var physicalFileSystem = new PhysicalFileSystem(@"./www");
        var options = new FileServerOptions
        {
            EnableDefaultFiles = true,
            FileSystem = physicalFileSystem
        };
        options.StaticFileOptions.FileSystem = physicalFileSystem;
        options.StaticFileOptions.ServeUnknownFileTypes = true;
        options.DefaultFilesOptions.DefaultFileNames = new[]
        {
            "index.html"
        };

        app.UseFileServer(options);
    }
}
The class above does two key things:
- Creates and configures Web API through
HttpConfigurationand sets up the default routing (api/{controller}/{id}). - Creates and configures a file server for static content through
PhysicalFileSystem, setting the root directory to./www.
Something to keep in mind when setting the path for the PhysicalFileSystem class is that you will need to set the Copy to Output Directory flag to Always on all items under the www directory. A cleaner approach is to add a new appSetting key to your app.config file and point it to a source folder:
<appSettings>
  <add key="www.rootDir" value="C:\path\to\www" />
</appSettings>
With this setting you just need to modify the following line:
var physicalFileSystem = new PhysicalFileSystem(@"./www");Changing it to this:
var contentDir = ConfigurationManager.AppSettings["www.rootDir"];
var physicalFileSystem = new PhysicalFileSystem(contentDir);
Don't forget to add a reference to System.Configuration.
Adding static content
Let's presume you have a www folder where you would like to serve content from, and this folder is part of your Visual Studio solution with an appSetting pointing PhysicalFileSystem to the right path:
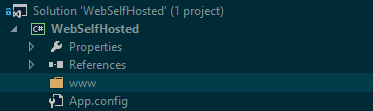
When it comes to adding content, you can now treat the www folder as if it were the root folder for a static web server and add files to it at will, keeping references to other files relative to your root directory.
Let's create our index.html file with the following contents in the root of www:
<!DOCTYPE html>
<html lang="en" xmlns="http://www.w3.org/1999/xhtml">
<head>
    <meta charset="utf-8" />
    <title>Hello World</title>
</head>
<body>
    Hello World
    <script src="scripts/hello.js"></script>
</body>
</html>
Next, we will create our scripts\hello.js file with the following contents:
alert('hello world');Hopefully by now you can see that this is pretty simple.
Adding a Web API Controller
Now let's get a bit more advanced and add in a simple Web API controller to the project that we can call to get some default values.
Create a new file called Controllers\API\ValuesController.cs with the following contents:
using System.Collections.Generic;
using System.Web.Http;

namespace WebSelfHosted.Controllers.API
{
    public class ValuesController : ApiController
    {
        // GET api/values
        public IEnumerable<string> Get()
        {
            return new[] { "value1", "value2" };
        }

        // GET api/values/5
        public string Get(int id)
        {
            return "value";
        }
    }
}
This controller will be available at http://localhost:12345/api/values when we run our project.
Wiring it all up
The last thing we need to do is create a new instance of our web application using the WebApp.Start<>() method in Program.cs to tie everything together. Add the following code to Program.cs:
using System;
using System.Diagnostics;
using Microsoft.Owin.Hosting;

namespace WebSelfHosted
{
    class Program
    {
        static void Main(string[] args)
        {
            string baseUrl = "http://localhost:12345/";
            WebApp.Start<Startup>(new StartOptions(baseUrl)
            {
                ServerFactory = "Microsoft.Owin.Host.HttpListener"
            });

            // Launch default browser
            Process.Start(baseUrl);

            // Kick off other program logic
            // ...

            // Wait for ENTER to close app
            Console.ReadLine();
        }
    }
}
That's all there is to it. Save and run your project using F5 to see it all in action:
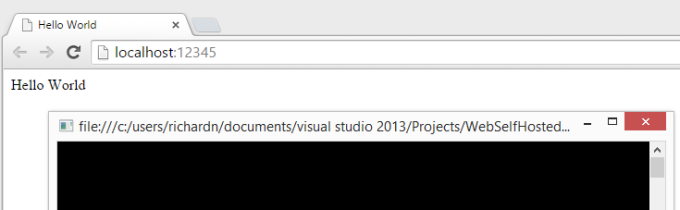
Web API up and running serving our ValuesController.cs file.
Going forward
I would suggest using NuGet to manage server-side packages. For client-side dependencies, modern projects typically use npm or a bundler like Vite or webpack rather than Bower (which has since been deprecated).
For the client-side interface, consider a modern framework such as Vue or React — both are well-supported and actively maintained. Adding full MVC to an OWIN self-hosted app would be overkill for most use cases.
Let me know what you think in the comments section below.