Automating .Net Core 2.x App NuGet Deployment with AppVeyor
In this post I am going to cover getting one of my .net core projects built in AppVeyor and automatically publishing to NuGet on a successful build.
Project structure
As it stands my project currently looks like this:
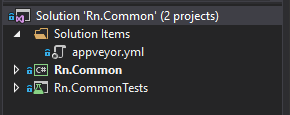
I have the main project (Rn.Common) that I wish to publish to NuGet, and a test project (Rn.CommonTests) that will be run before the publication to ensure nothing breaks between commits.
Lastly, I only want to run the automated build \ publish flow when code is pushed into the master branch only, as I normally use this as a release branch.
I originally had this working with the .net framework but it was obviously not compatible with .net core. After a couple of hours messing about, I managed to get everything working as I wanted, below is the process I followed.
Generate a NuGet deployment key
First I headed over to NuGet.org and generated a deployment key to use with AppVeyor:

Be sure to save this key in a safe place and do not expose it publicly.
Configure AppVeyor
Once we have the deployment key we will need to make a couple of changes to our AppVeyor project to support .net core - I already had an existing project to modify, but if you don’t have one, now would be the time to create it.
Under the Settings page for your project navigate to the General section and ensure that .NET Core .csproj patching has been enabled (as shown below):

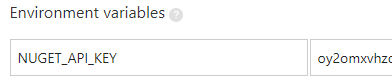
Then navigate to the Environment section and create a new environment key called NUGET_API_KEY (or whatever you prefer) and place in your key from step (1) for its value. This way we do not need to place this key in our build script, keeping it nice and safe.
That’s it for the AppVeyor web configuration.
Create an appveyor.yml file
Next you will need to create an appveyor.yml` file in the root of your repository with the following content:
1
2
3
4
5
6
7
8
9
10
version: 1.0.{build}
image: Visual Studio 2017
branches:
  only:
  - master
init:
  # Good practice, because Windows line endings are different from Unix/Linux ones
  - cmd: git config --global core.autocrlf true
build_script:
  - ps: ./build/package.ps1
Here we do the following key things:
- We set the build environment to
Visual Studio 2017(required for .net core) - We limit the build to only trigger on the master branch
- We call the
./build/package.ps1to do all the heavy lifting
That’s it for my appveyor.yml file.
Create a build script
After a lot of trial and error with the appveyor.yml file I decided to use PowerShell as my main build script due to some road blocks I was getting with the yml limitations. The below is what I came up with, I will run through the main parts of the script quickly.
The first thing I do is grab the build folder and build number from the available AppVeyor variables:
1
2
3
# Script static variables
$buildDir = $env:APPVEYOR_BUILD_FOLDER # e.g. C:\projects\rn-common\
$buildNumber = $env:APPVEYOR_BUILD_VERSION # e.g. 1.0.17
Next, I define all the folders I will be working with using full paths wherever I can:
1
2
3
4
$projectDir = $buildDir + "\src\Rn.Common";
$projectFile = $projectDir + "\Rn.Common.csproj";
$testDir = $buildDir + "\src\Rn.CommonTests";
$nugetFile = $projectDir + "\Rn.Common." + $buildNumber + ".nupkg";
I print out the installed .net core version to make troubleshooting easier:
1
2
3
# Display .Net Core version
Write-Host "Checking .NET Core version" -ForegroundColor Green
& dotnet --version

Next, I navigate to the project directory and run a restore:
1
2
3
# Restore the main project
Write-Host "Restoring project" -ForegroundColor Green
& dotnet restore $projectFile --verbosity m

The run a publish to generate the project binaries:
1
2
3
# Publish the project
Write-Host "Publishing project" -ForegroundColor Green
& dotnet publish $projectFile

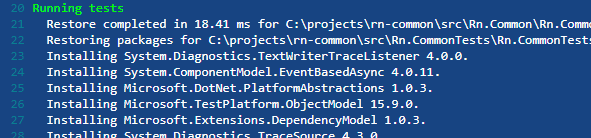
Next, I navigate to the test folder and run my tests:
1
2
3
4
5
6
# Discover and run tests
Write-Host "Running tests" -ForegroundColor Green
cd $testDir
& dotnet restore Rn.CommonTests.csproj --verbosity m
$testOutput = & dotnet test | Out-String
Write-Host $testOutput
I capture the output of the tests and ensure that they passed with the below check - should the tests fail I will Exit the build script:
1
2
3
4
5
# Ensure that the tests passed
if ($testOutput.Contains("Test Run Successful.") -eq $False) {
  Write-Host "Build failed!";
  Exit;
}

Next, I call dotnet pack to generate a NuGet package for my project using the settings defined in Visual Studio.
1
2
3
4
# Generate a NuGet package for publishing
Write-Host "Generating NuGet Package" -ForegroundColor Green
cd $projectDir
& dotnet pack -c Release /p:PackageVersion=$buildNumber -o $projectDir

Once that has completed, I add the generated NuGet file to AppVeyors build artefacts:
1
2
3
# Save generated artifacts
Write-Host "Saving Artifacts" -ForegroundColor Green
Push-AppveyorArtifact $nugetFile

The last thing left to do it publish the package to NuGet using our API key defined earlier and referencing the package built above:
1
2
3
# Publish package to NuGet
Write-Host "Publishing NuGet package" -ForegroundColor Green
& nuget push $nugetFile -ApiKey $env:NUGET_API_KEY -Source https://www.nuget.org/api/v2/package

1
2
# Done
Write-Host "Done!" -ForegroundColor Green
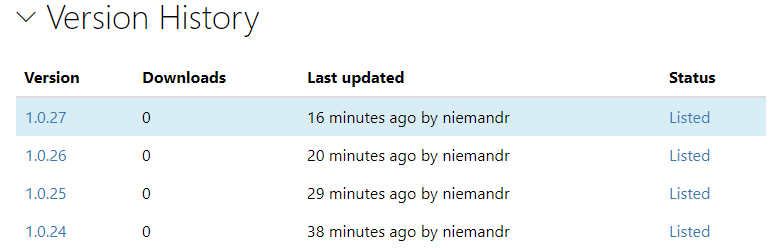
This results in a new version of the Rn.Common package being deployed to NuGet as can be seen below.
Final Thoughts
This is by no way the best solution to automating the build process, however it does what I need it to do. There are some limitations with AppVeyor now, with the biggest one being that they don’t support .net core 2.2 at time of writing.
I welcome feedback, comments and suggestions!
Comments powered by Disqus.