Home Assistant From Scratch - Secrets and Security
This is one post in a series of getting up and running with Home Assistant from scratch.
Today I am going to be covering secrets and security in Home Assistant along with a semi-decent workflow to use with your Home Assistant deployment which will allow for easy management and rollback of your configuration.
We will be making the following changes to our installation today:
- Securing the web interface with a password
- Using secrets for sensitive data
- Version Controlled Configuration with GitHub
Core Concepts
Before we dive right into locking down Home Assistant (known going forward as HASS) there are a few concepts we need to bed down first. Once you are familiar with the below HASS becomes a whole lot less scary and complex, and you should be making changes to your configuration in no time flat.
Components
Home Assistant could be thought of as a framework for collecting, aggregating, managing and displaying data from IoT (or smart home) devices. The way this is achieved is through the use of custom components written for the “thing” in question.
Home Assistant components cover a wide plethora of devices from a simple store bought device (e.g. Philips Hue) to something custom like an ESP8266 running custom code communicating over MQTT. Regardless of the thing you want to control, Home Assistant will most likely have a component for it - this could be a generic component (e.g. MQTT Light) or a fully fledged one (e.g. Philips Hue Light).
Components are defined and configured through the configuration.yaml file, and is done so by adding in the component-specific keyword followed by any additional settings required. When Home Assistant starts up it loads this configuration file and sets up all your user-defined components. These loaded components are then managed by Home Assistant and displayed to you through the web interface.
YAML
YAML is the preferred configuration file format used by Home Assistant, which in essence is a human-readable configuration file format which is unforgiving when it comes to the usage of spaces (think of Python).
YAML aims to have all configuration files consistent through its strict spacing rules (which can be a pain to debug), but that pain is worth it - believe me.
All the configuration we will be doing in Home Assistant will be done through this format, and by the end of this series I have no doubt that you will be used to it.
In YAML spacing is everything!
Configurator
Configurator is an add-on that is available for Home Assistant when running their “all-in-one-image” on something like a Raspberry Pi or other supported single board computer.
In a nutshell, Configurator is a web based text editor which allows you to make changes to your Home Assistant setup without the need to access the configuration files through some other mechanism (e.g. FTP / SSH/ File Share). It is simple to use and is great for making quick changes to your Home Assistant setup.
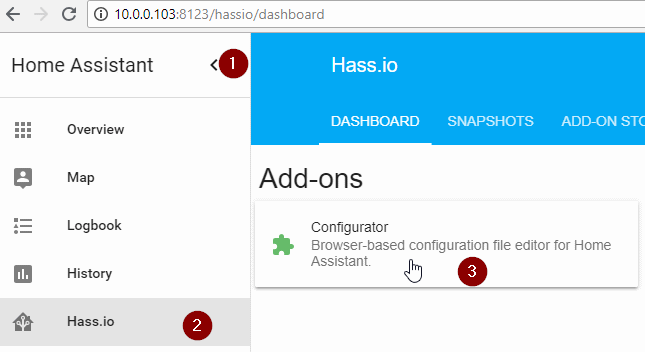
Configurator can be accessed through the Hass.io -> Configurator add-on as shown above.
Securing the web interface
The web interface for Home Assistant is controlled through the HTTP component.
In order to lock it down we will need to add the following configuration property under the http component section in your Home Assistant configuration.yaml file:
1
2
http:
  api_password: "<password>"
Note the additional (2 spaces) before api_password, if these are omitted you will run into issues.
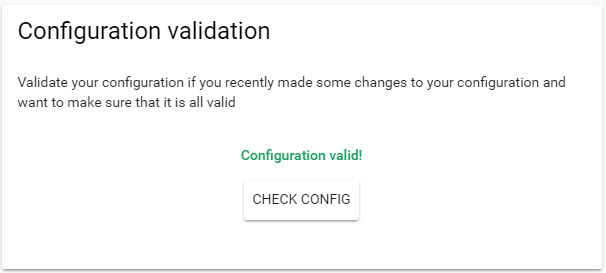
Once done, save your changes and validate your configuration - this is done by navigating to Configuration on the side menu -> General -> Check Config. If your configuration is correct you should see the following response:
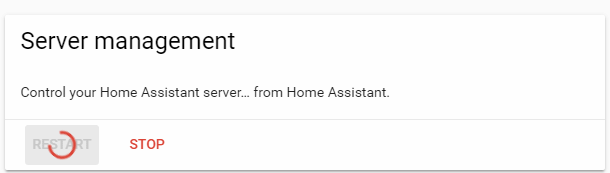
It is now safe to click the Restart button below to restart Home Assistant and apply your changes.
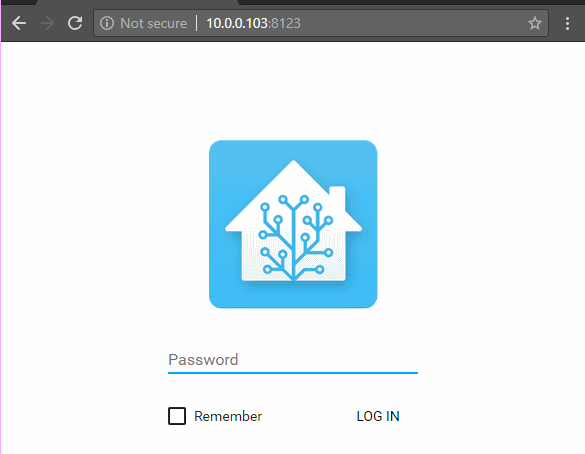
Home Assistant should now prompt you for your password.
That’s all there is to securing your setup!
Using Secrets
The secrets.yaml file can be found in the same directory as your configuration.yaml file and is intended to store sensitive information for your setup.
This extremely simple, yet unbelievably powerful concept makes it easy (and safe) to share your configuration with the community without any sensitive information (e.g. your password). You can simply omit this file when you share your configuration with someone else.
Any key added into secrets.yaml is available in any other Home Assistant configuration file through the !secret KEY_NAME syntax, more info on secrets can be found here.
I think that it is best to see this sort of thing in action though, so let’s move our web interface password out of our configuration.yaml to allow us to “share” our configuration.
Add the following line into secrets.yaml: http_password: your_password
Then modify configuration.yaml to use the secret version of your password instead of hard-coding it into your main configuration file.
1
2
http:
  api_password: !secret http_password
Validate your configuration (like we did above) and restart Home Assistant.
Everything should still work as expected, that’s all there is to it.
Version Controlled Configuration
The last thing I would like to cover today, although it’s not required, is adding your configuration to some form of source control system (e.g. git). This will give you the freedom to confidently make changes to your home setup and roll back to any older version of your configuration should you feel the need to. This will give you more freedom with your setup as you will always have a fall back should something go wrong.
Personally I will be storing my configuration on a public GitHub repository to serve as my personal backup and as a supplementary repository for this series. I will be using Gitkraken on my Windows computer and managing the configuration through a mapped file share (set up in the last post using Samba). This is more for convenience for me than anything else as I already have Git setup on my computer with my SSH keys.
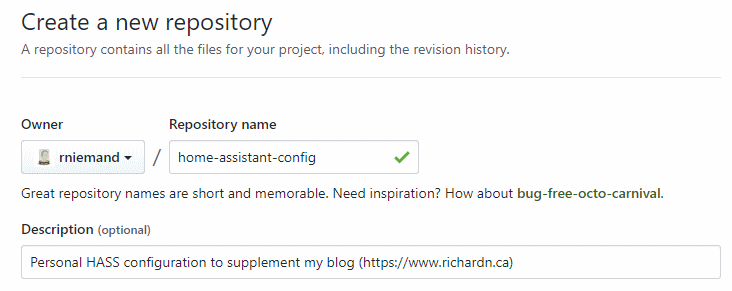
Create your repository
Head over to GitHub and create a new repository for your configuration to live in:
Once created check it out with Gitkraken to any folder on your computer, we will be moving it shortly.
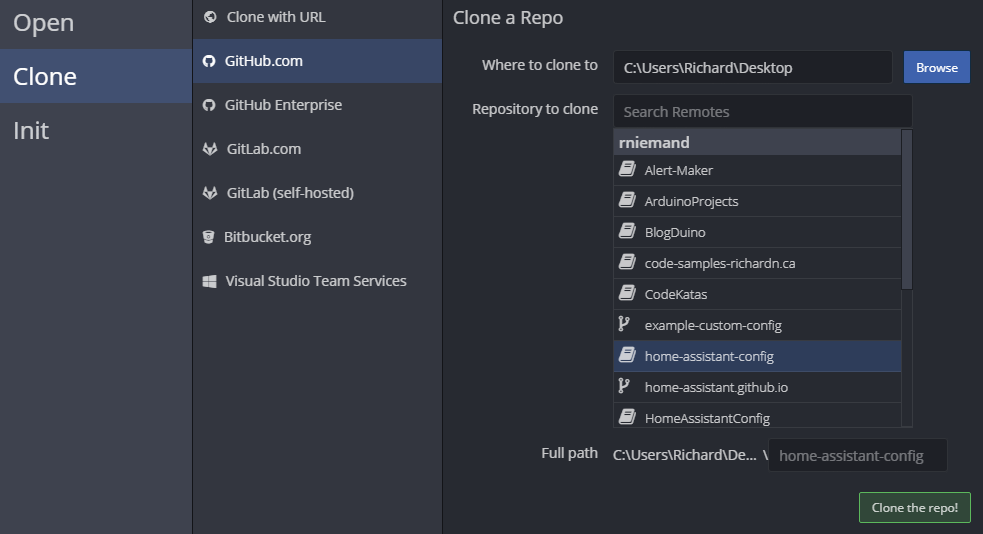
Be sure to open, initialize, commit and push your changes back to GitHub - don’t worry Gitkraken will prompt you for these steps, once done your first commit should be live.
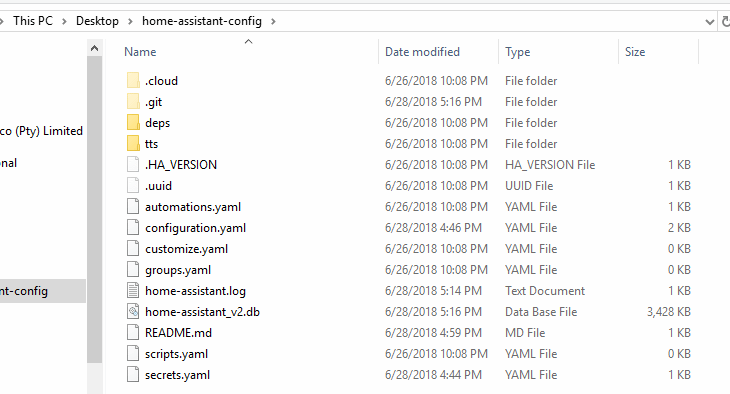
Copy your current configuration
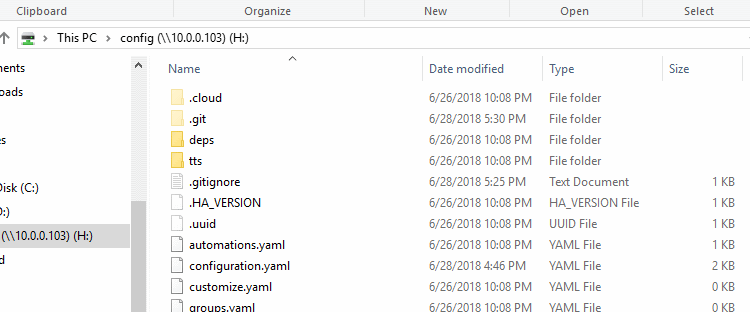
Copy everything from your Home Assistants configuration folder (e.g. \\10.0.0.103\config) into the root folder where you checked out your GitHub repository.
NOTE: If you run into access issues try changing the following registry key
\HKEY_LOCAL_MACHINE\SYSTEM\CurrentControlSet\Services\LanmanWorkstation\Parameters\AllowInsecureGuestAuthto1- it did wonders for me.
Once we have our files in the folder we will need to add a .gitignore file to exclude our secrets.yaml file and any other non-essential files from being committed. To create the .gitignore file open a command prompt window, navigate to your repository folder and run this command.
1
"" > .gitignore
Open the .gitignore file and add the following exclusions to the file.
1
2
3
4
5
6
7
\.HA_VERSION
\.uuid
home-assistant_v2\.db
home-assistant\.log
secrets\.yaml
tts/
\.cloud/
Save and close the file, you are now ready to commit your changes to GitHub.
Open Gitkraken and click on the latest change set, it should look something like this:
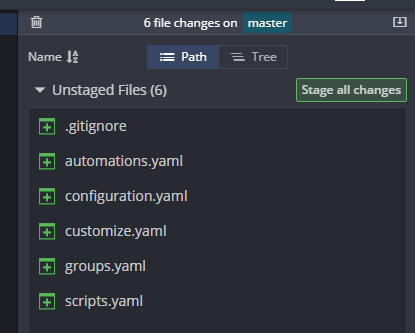
Take note that our secrets.yaml and home-assistant_v2.db files are missing, great!
Stage, Commit and push your changes.
Overwrite HASS Config Files
Now that we are happy with our git setup we can move all our files back over to our Home Assistant server making sure to replace any conflicting files. Essentially we are just moving the .gitignore and .get file and folder over.
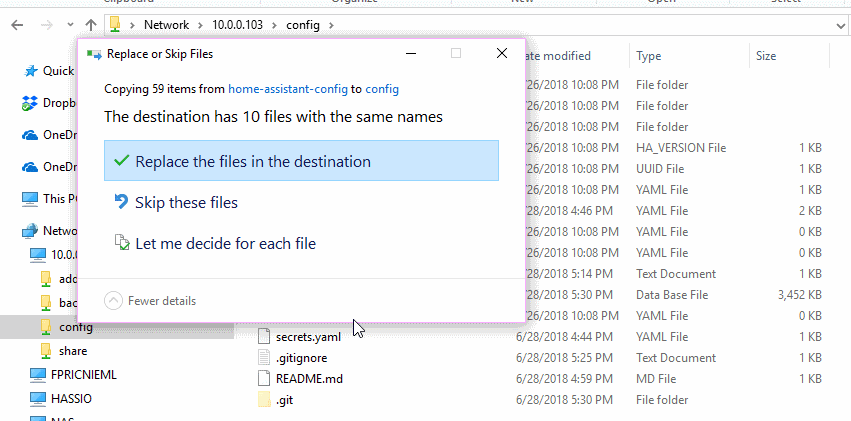
Close Gitkraken, delete your temporary repository (checked out above), map your remote configuration folder (in my case H:) and open it back up in Gitkraken.
Now any changes you make to Home Assistant via Configuration can be tracked and committed to version control.
Final Thoughts
Although this was a long post, we only covered the 3 S’s of our Home Assistant setup (security, secrets and source control), in addition to that I covered some basic concepts that we will use going forward in an effort to save time later on. Armed with this you now know enough to be dangerous :).
In the nest post we will finally look at doing something with the UI and perhaps adding in a device or two.
As always I welcome any feedback, comments and questions.
Comments powered by Disqus.