Docsify for your projects
This post is a starter post for docsify and it’s usage - this is a work in progress and will be updated periodically when I stumble upon anything that I find interesting.
The docsify Flow
Installing docsify
This is based on the official Quick Start Guide, and the process is as simple as…
Installing docsify globally if you do not already have it installed:
1
npm i docsify-cli -g
If you decide to install
docsifyglobally, you only need to run the above command once!
Initializing docsify
To add docsify to your project simply naviate to your projects root directory and issue the following command where ./docs is the name of the directory you wish to save your documentation to:
1
docsify init ./docs
General Usage
To serve documentation using docsify simply navigate to the directory that contains your documentation and run the following command replacing docs with your documentation directory name:
1
docsify serve docs
This will serve your documentation on http://localhost:3000 by default.
Configuring docsify
All core configuration for docsify is done in the index.html file using the window.$docsify script object, I generally configure the following when starting documentation for a new project:
1
2
3
4
5
6
7
8
  window.$docsify = {
    name: 'PROJECT_NAME',
    repo: 'rniemand/RepoSlug',
    loadSidebar: true,
    maxLevel: 4,
    subMaxLevel: 3,
    externalLinkRel: '_blank'
  }
You can see a full list of all configuration options here.
Themes
You can theme docsify by simply including a reference to the theme css file you would like to use:
1
2
3
4
5
<!-- Replace -->
<link rel="stylesheet" href="//cdn.jsdelivr.net/npm/docsify@4/lib/themes/vue.css">

<!-- with -->
<link rel="stylesheet" href="https://cdn.jsdelivr.net/npm/docsify-themeable@0/dist/css/theme-simple-dark.css">
You can see all possible theme configuration options here.
Additional themes can be found on docsify-themeable!
Side Navigation
If you would like to customize the side navigation for your documentation you can add _sidebar.md to your root documentation directory.
Generally the sidebar is used to place an list of links to make navigating your documentation a lot easier, you can use the global $docsify object to configure the behaviour of the sidebar:
1
2
3
4
5
  window.$docsify = {
    loadSidebar: true,
    maxLevel: 4,
    subMaxLevel: 3
  }
Syntax Highlighting
Docsify makes use of prismjs for it’s syntax highlighting support and comes with a couple of pre-installed languages, you may find the need to add in additional grammar files to work for your project.
You can browse all supported grammar files here and can include them in your documentation using the following HTML snippet:
1
<script src="//cdn.jsdelivr.net/npm/prismjs@1/components/prism-csharp.min.js"></script>
Common grammar files
These are my go-to grammar files for my projects:
| Language | Grammar File |
|---|---|
| Bash / Shell | //cdn.jsdelivr.net/npm/prismjs@1/components/prism-bash.min.js |
| C# | //cdn.jsdelivr.net/npm/prismjs@1/components/prism-csharp.min.js |
| JSON | //cdn.jsdelivr.net/npm/prismjs@1/components/prism-json.min.js |
| PowerShell | //cdn.jsdelivr.net/npm/prismjs@1/components/prism-powershell.min.js |
| TSql | //cdn.jsdelivr.net/npm/prismjs@1/components/prism-sql.min.js |
| Yaml | //cdn.jsdelivr.net/npm/prismjs@1/components/prism-yaml.min.js |
Plugins
Docsify has support for plugins and has a couple of good official plugins along with a curated list of community driven plugins that should meet the needs of most application documentation.
Below are a couple of plugins that I like to include with my documentation:
Copy to Clipboard
The copy-to-clipboard is used to add a Copy to clipboard option on any code sample when the plugin is installed:

Installation:
1
<script src="//cdn.jsdelivr.net/npm/docsify-copy-code/dist/docsify-copy-code.min.js"></script>
Configuration:
1
2
3
4
5
6
7
8
window.$docsify = {
  // docsify-copy-code (defaults)
  copyCode: {
    buttonText : 'Copy to clipboard',
    errorText  : 'Error',
    successText: 'Copied'
  }
}
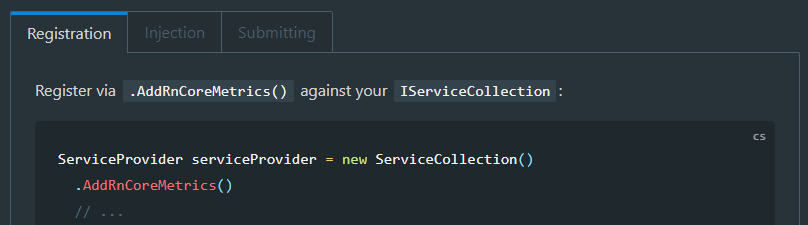
Tabs
The tabs plugin allows you to define and use tabs in an effort to reduce the length of generated pages:
Installation:
1
<script src="https://cdn.jsdelivr.net/npm/docsify-tabs@1"></script>
Configuration:
1
2
3
4
5
6
7
8
9
10
window.$docsify = {
  // ...
  tabs: {
    persist    : true,      // default
    sync       : true,      // default
    theme      : 'classic', // default
    tabComments: true,      // default
    tabHeadings: true       // default
  }
};
GitHub Pages
There are multiple deployment options available when using docsify, however the mpst apt one for me is the built in pages support from GitHub.
You can refer to the full deployment guide here if you require additional information - however the configuration is pretty straight forward:
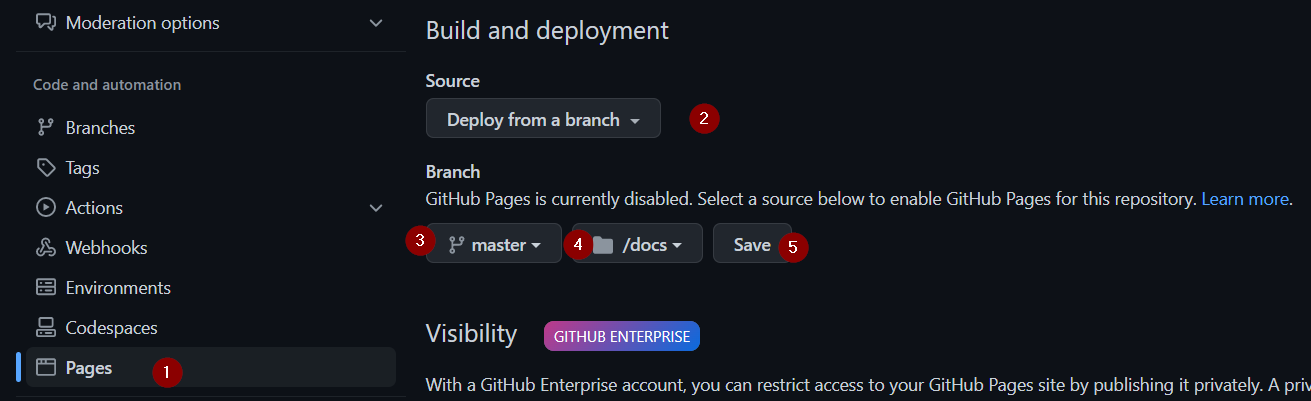
- Select Pages under your repos settings
- Ensure that Deploy from a branch is selected
- Select the appropriate
branchandsourcefolder to deploy from - Click Save to persist the changes
Once configured your documentation should be available on your configured GitHub custom domain - e.g. https://www.richardn.ca/<repo-name>/#/
In Closing
Hopefully this makes documentation a bit easier.