Svelte Tips and Tricks
Vite Related Tips
Host Port Binding
Every now and then I run into an odd issue where I am unable to launch a svelte project in my browser (due to the connection timing out).
If you run into this issue where your application is compiling, but not accessible I found that the following configuration entry in my vite.config.ts file helps a lot.
1
2
3
4
5
6
export default defineConfig({
  server: {
    host: "127.0.0.1",
  },
  // ...
});
Alternatively you can achieve the same result using sirv in your packages.json file.
1
sirv public --host 127.0.0.1 -p 5000
Svelte Configuration
Static Site Generation (SPA)
Should you want to generate a static site from your svelte project you can simply swap out the default formatter in your svelte.config.js file with the more appropriate @sveltejs/adapter-static adapter.
1
2
3
4
import adapter from "@sveltejs/adapter-static";
import { vitePreprocess } from "@sveltejs/kit/vite";
// ...
export default config;
Correcting the Base URL
Should you want to set an explicit base URL instead of making use of the default relative one (and providing that you know the implications of doing so), you can do this by adding in the following lines in your svelte.config.js file.
1
2
3
4
5
6
7
8
9
/** @type {import('@sveltejs/kit').Config} */
const config = {
  kit: {
    paths: {
      base: "",
      relative: false,
    },
  },
};
In the example above I am setting the path to “” and disabling relative pathing, this combined with my settings in +layout.js allow for me to land on any URL of my application with no additional URL rewrites on Nginx or IIS.
1
2
3
export const prerender = true;
export const ssr = false;
export const trailingSlash = "always";
Svelte Components
Accessing “class” in your component
If you wish to use the “class” property on your custom component you can do so by using one of the following methods.
The first method is by far the simplest and that is just using the $$props.class props:
1
2
3
<button type="button" class="{classes} {$$props.class}">
  <slot />
</button>
Alternatively you can create a local variable and export it as “class”:
1
2
3
4
5
6
7
8
<script lang="ts">
  let classes: string = "";
  export { classes as class };
</script>

<button type="button" class="{classes}">
  <slot />
</button>
Exporting “on:” events on a custom component
Should you want to export on: events on a custom svelte component you can do so by simply adding the event that you wish to export onto your component with no body attached to it - svelte will hoist this declaration up and expose it externally allowing you to bind to those events externally.
1
2
3
<div class="link {$$props.class}" class:active on:click>
  <slot />
</div>
Styling child components
Svelte provides a mechanism for styling child components through the use of the :global() css selector, which allows you to define styling for child components (providing that the css selector is satisfied).
1
2
3
4
5
6
7
8
9
10
11
12
13
14
15
16
17
18
<style>
  .links-container {
  }
  .links-container :global(.link) {
  }
  .links-container :global(.link:last-child) {
  }
  .links-container :global(.link:hover) {
  }
  .links-container :global(.link.active) {
  }
</style>

<div class="mt-2">
  <div class="links-container">
    <slot />
  </div>
</div>
1
2
3
<div class="link {$$props.class}" on:click>
  <slot />
</div>
Misc
One highly recommended plugin for VS Code is Svelte for VS Code - it offers a lot of useful features like syntax highlighting, code completion and suggestions, and some additional debugging tools.
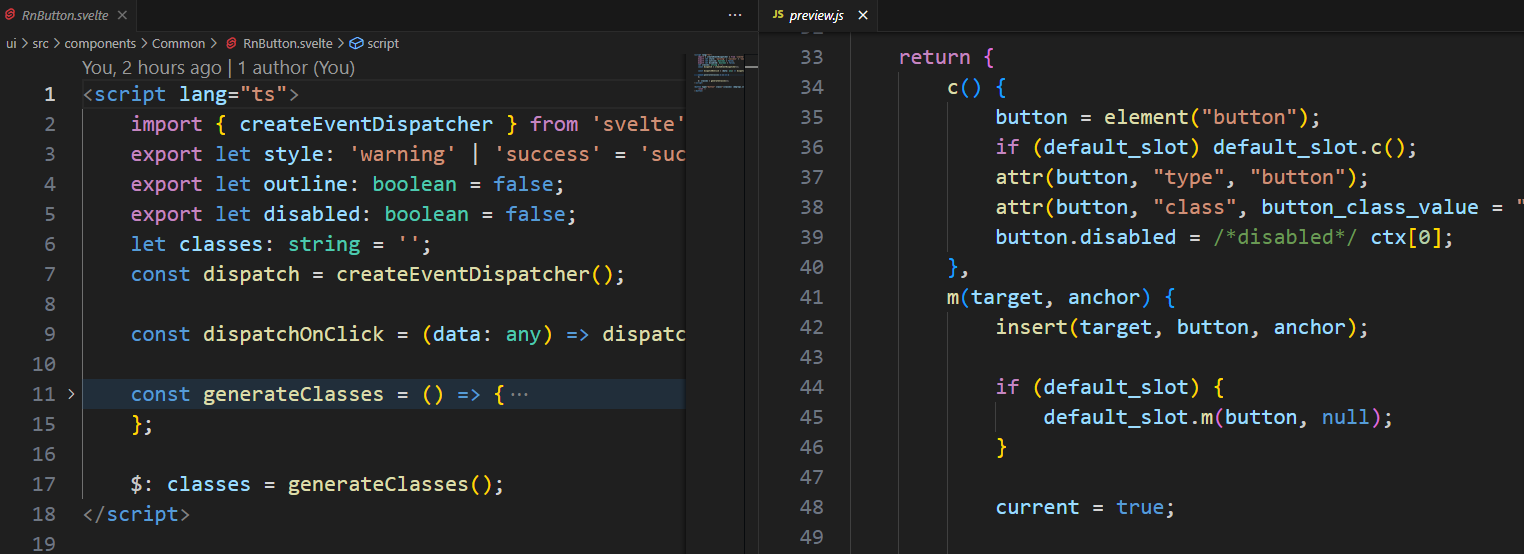
One of the best features is the ability to show the compiled code for a svelte component - this is accessible through the CTRL + SHIFT + P key combination.
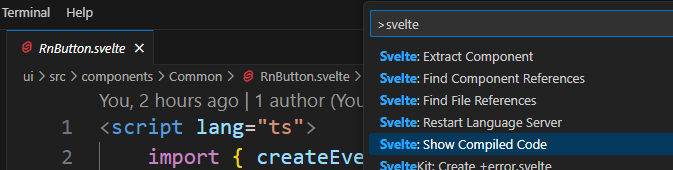
When invoked, this will show you the generated code for the active component it was called on.
Comments powered by Disqus.